Settings
Introduction
Account Settings
You can change and update your Perimeter Account Details in the Account Settings section.
To access the Account Settings page:
Click on the icon at the top right of the page
Click on the name of the account holder
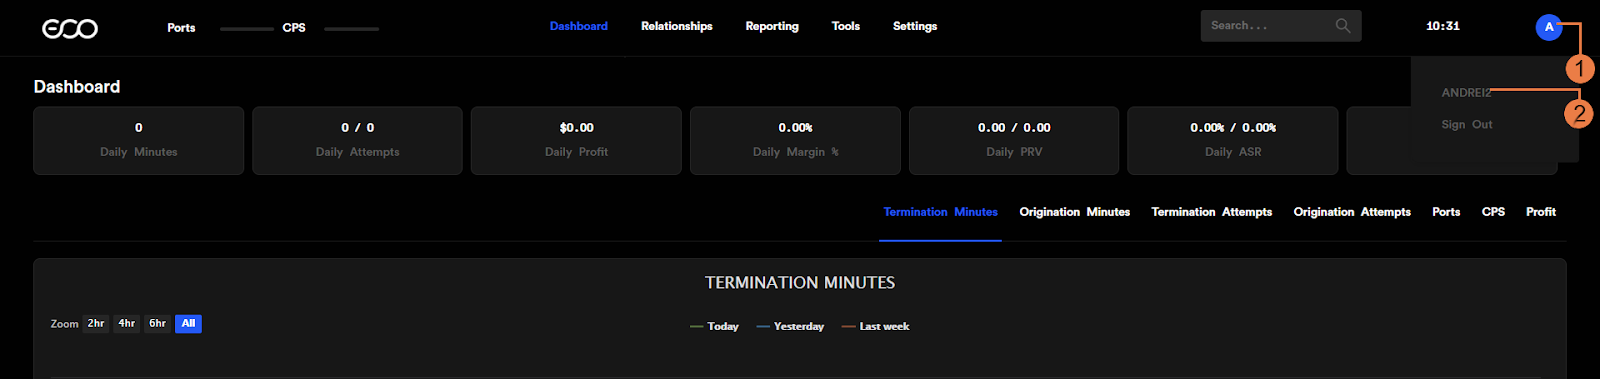
In the Account Setting page, you can:
Change the user’s name
Change the account email
Upload a profile picture
Change the Perimeter theme: Dark, Light or Gray
Update the account password
Set up an inactivity logout timer
General Settings
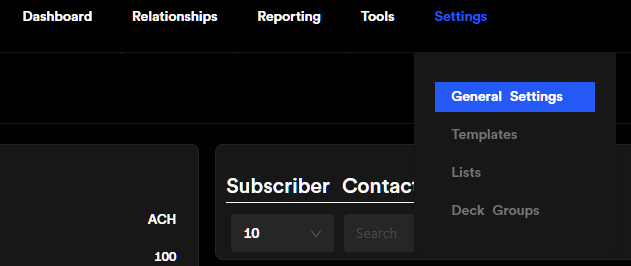
The General Settings page allows you to configure your company’s Perimeter profile. The changes here affect all Perimeter users and functions.

To access the General Settings page:
Hover over the Settings button located in the top menu
Click on General Settings
General Settings Dashboard
Settings > General Settings
In the dashboard, you can change the following sections:
Provisioning Information
Subscriber Information
Address Information
Phone Information
Logo
Subscriber Contacts
Paypal Integration
Default Email address

Provisioning Information
Settings > General Settings
This section displays the technical provisioning details associated with your account. To edit those, you will need to contact our support team. The following information is displayed:
Provisioned Ports
Provisioned CPS
Provisioned Media
Payment Method
Public IP
Method
Type
Set
Subscriber Information
Settings > General Settings
This section allows you to set up log in and daily balance messages for each user of the switch.
You can edit the following:
Subscriber Name
Display Name
Website Address
Time Zone
Address Information
Settings > General Settings
Address 1
Address 2
City
State
Country
Phone Information
Settings > General Settings
Phone number
Mobile number
Fax number
Logo
Settings > General Settings
The Logo will be displayed on Invoices. To upload:
Press on the Select Logo button
Choose your file in the explorer
Press OK
Subscriber Contacts
Settings > General Settings
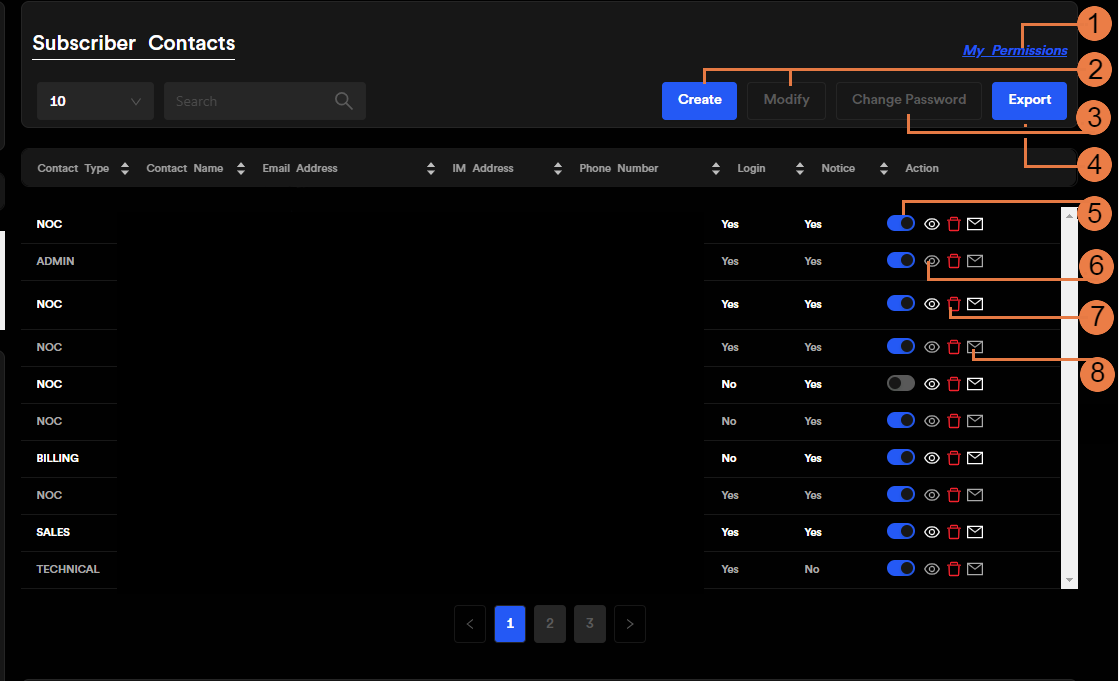
All Subscriber contacts have unique login credentials. All changes made by the subscribers in Perimeter will have their name associated. You can see the changes in the Logs and History sections of Perimeter.
You can use the Subscriber Contacts to grant and revoke access to your employees, ensuring smooth on-boarding and off-boarding procedures.
From the Subscriber Contacts section, you can:
View your account permissions
Create/Modify Subscribers
Change Subscriber Password
Export
Activate/Deactivate account
View Login History
Delete
Resend welcome email, change user password
Create/Modify Subscribers
Settings > General Settings > Subscriber Contacts
When you create a new subscriber, a welcome email will be automatically sent to the provided email address.
To Create or Modify subscribers:
Press on Create
or
Select an existing subscriber and click on Modify
Select Contact type:
NOC
Sales
Billing
Admin - This option will enable the user to have full privileges on Perimeter, including creating and deleting subscribers
Technical
Provide the User Name
Provide the Contact Email Address
Provide the Contact’s name
Provide the Contact’s IM address
Provide the Contact’s Phone number
Toggle Login Rights - this option will enable the user to login with a new set of credentials
Toggle Receive Notices - the user will receive notifications with changes made in Perimeter
Click on Create

Change Subscriber Password
Settings > General Settings > Subscriber Contacts
 Important Note: When clicking on Change Password, the process is instantaneous and the user will be sent an email containing their newly generated password.
Select an existing subscriber from the list
Click on Change Password

Export
Settings > General Settings > Subscriber Contacts
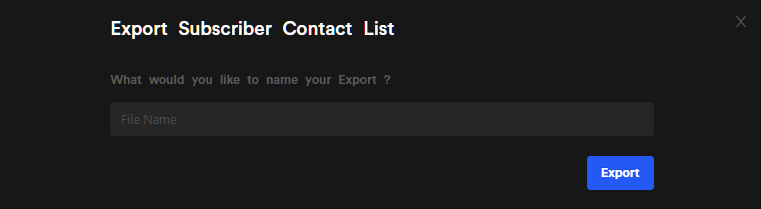
You can export a .csv of all the existing subscribers.
Click on Export
Provide a name for the .csv file and click on Export
A newly generated .csv file will begin downloading
Activate/Deactivate
Settings > General Settings > Subscriber Contacts
You can deactivate contacts to prevent them from logging in temporarily:
At the right of the Subscriber Contact entries, use the toggle to Activate and Deactivate the account
View Login History
Settings > General Settings > Subscriber Contacts
To view Subscriber login history:
At the right of the Subscriber Contact entries, click on the History icon
In the pop-up window, you will see the past Logins for the selected user

Delete
Settings > General Settings > Subscriber Contacts
At the right of the Subscriber Contact entries, click on the red Delete icon
In the pop-up window, press on Delete
Send Email
Settings > General Settings > Subscriber Contacts
This function will send a new Welcome email to the user and will generate a new password.

PayPal Integration
Settings > General Settings
Perimeter currently supports payments made through PayPal. In the section, you can edit the main debiting and crediting Paypal account. An agent must have the display accounting information checkbox checked in order to send payments.
You can edit the following:
PayPal account - the email address associated to the PayPal account
Mode - Development or Provisioning
Status - Enabled or Disabled
Default Email address
Settings > General Settings
The Default Email Address is the address used when Perimeter was provisioned. It defaults as the main address for communication (sending invoices and rates) unless stated otherwise in Templates.
To edit the default email address:
Type in the new email address in the field
Press on Save Changes
Bandwidth.com E911 Integration
Settings > General Settings
Users can provision 911 numbers for any carrier they want authorized to dial 911 through the system. To configure, provide the following:
Username
Password
Vendor E911 Rate (USD)
Vendor E911 Penalty Rate (USD)
E911 Default Settings
Settings > General Settings
To configure E911 defaults settings, provide:
E911 provider
Customer Rate (USD)
Customer Penalty Rate (USD)

Templates
Settings > Templates
Templates are pre-configured details and data sets. For example they can hold variables such as rates and prices to produce consistent results.
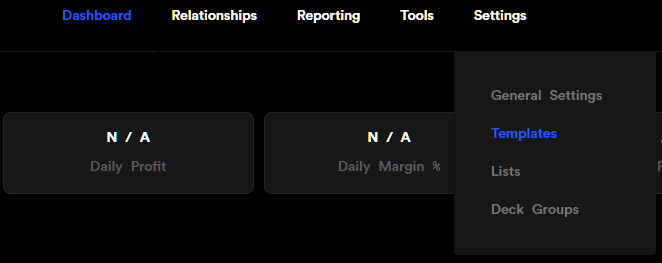
To access the Templates Menu:
Hover over Settings located on the top menu bar
Click on Templates
Perimeter features 4 types of templates:
Rating
Invoicing
Balance/Payment
Portal
Email Body Variables
Settings > Templates
You can use a number of variables in your email body by typing in @.
Those variables will be replaced in the email with the details registered in the relationship.
For example: @CARRIER_NAME will be replaced with ABC Telecom.
Settings > Templates > Rating
The Rating Template is used for feeding information into Rate Sheets and Rate Decks.
In the Rating Template Dashboard, you can:
Create/Modify a Rating Template
Delete a Rating Template

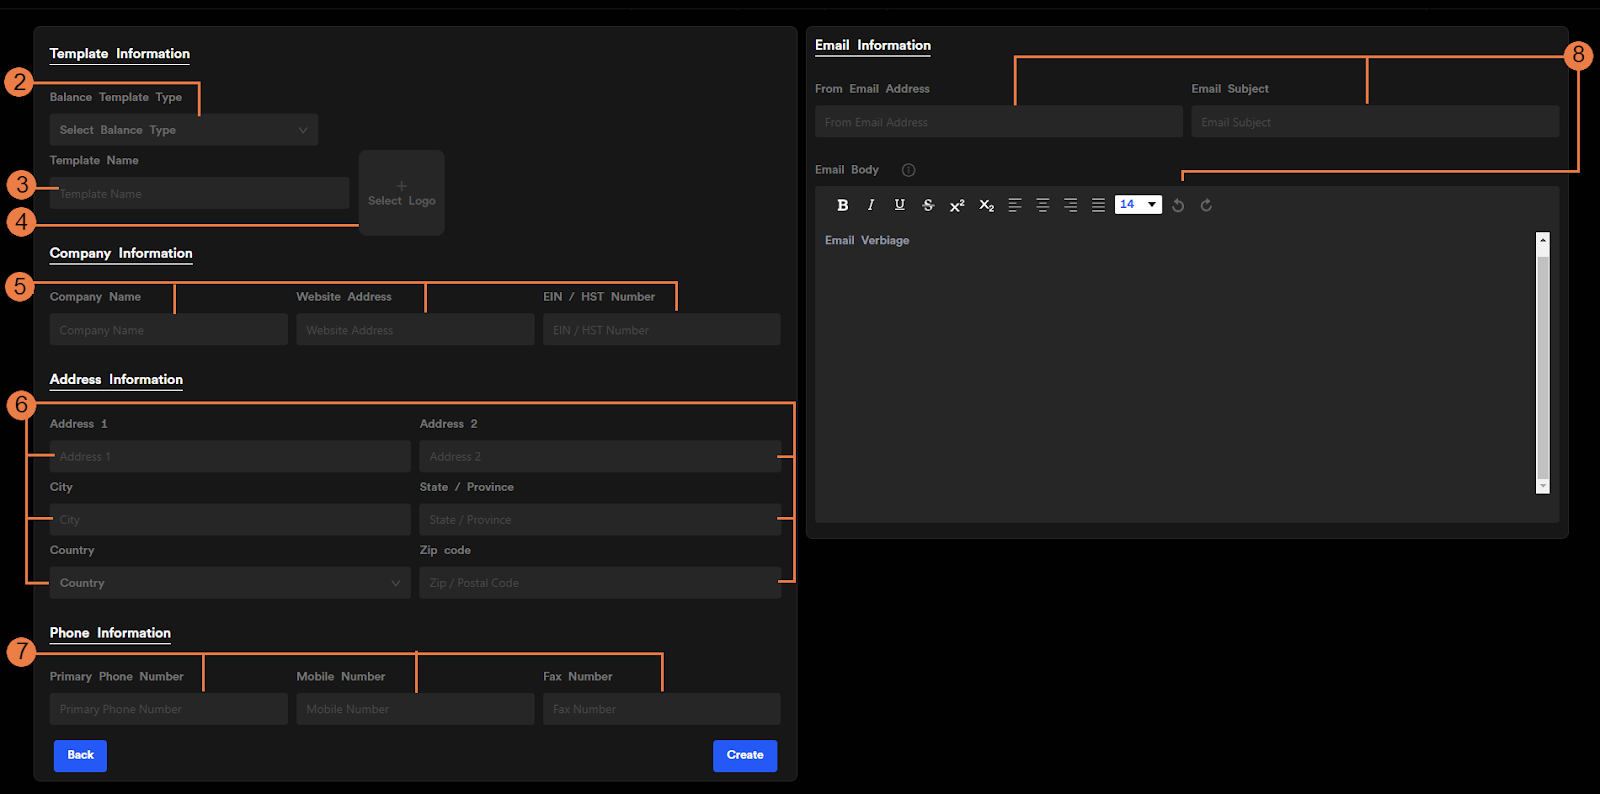
Create or Modify a Rating Template
Settings > Templates > Rating
In the Rating Template Dashboard:
Click on Create
or
Select a Rating Template from the list and click on Modify
Provide a Template Name
Select a Logo for the Rating Template
Provide Company Information:
Company Name
Website Address
EIN / HST Number
Provide Address Information:
Address 1
Address 2
City
State
Country
ZIP Code / Postal Code
Provide Phone Information:
Primary Phone Number
Mobile Number
Fax Number
Provide Email Information
The ‘From’ Email address: this will be the sender address used when distributing Rate Sheets
Email Subject: the subject for the emails distributed containing Rate Sheets
Email Verbiage: the email content

Delete a Rating Template
Settings > Templates > Rating
In the list containing the Rating Templates, click on the red Delete icon
In the pop-up window, press on Delete
Assign a Rating Template in a Relationship
Settings > Templates > Rating
In the top bar menu, hover over Relationships and click on Relationships in the drop-down menu
In the Relationship Dashboard, click on a relationship and press on Modify
In the menu at the top right, navigate to Rating
Select the Template from the drop-down menu

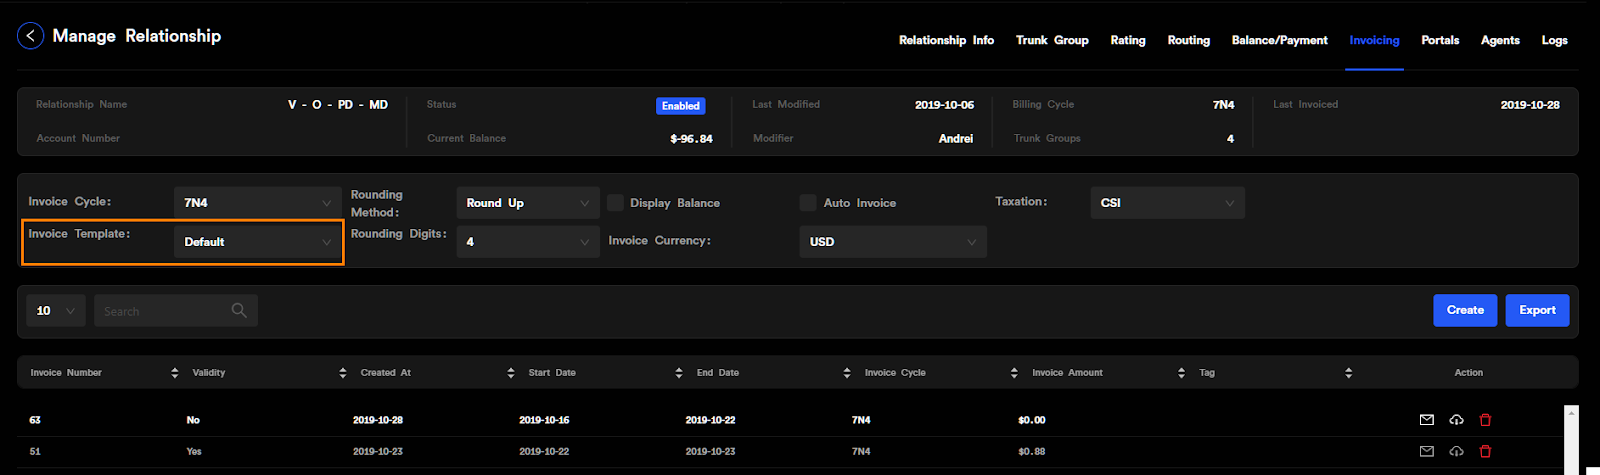
Invoicing Template
Settings > Templates > Invoicing
The Invoicing Template enables you to configure high-level Invoice settings and set up information about your company.
From the Invoicing Template dashboard, you can:
Set Invoicing details
Create/Modify Invoice Templates
Delete Modify Invoice Templates
Set Invoicing Details
Settings > Templates > Invoicing
You can set the Invoicing details from the top section of the page. You can set up the following fields:
Invoicing Cycle - select an invoicing Cycle or set to Prepaid
Rounding Method - Round Up or Down
Rounding Digits - Number of decimals
Invoicing Currency - currently only USD is supported
Automated Invoicing - toggle Yes or No
If Yes - Invoice Frequency - number of days or weeks
Display Balance on Invoice - toggle Yes or No
Taxation - None, Fixed Fee or Percentage
Taxation Value

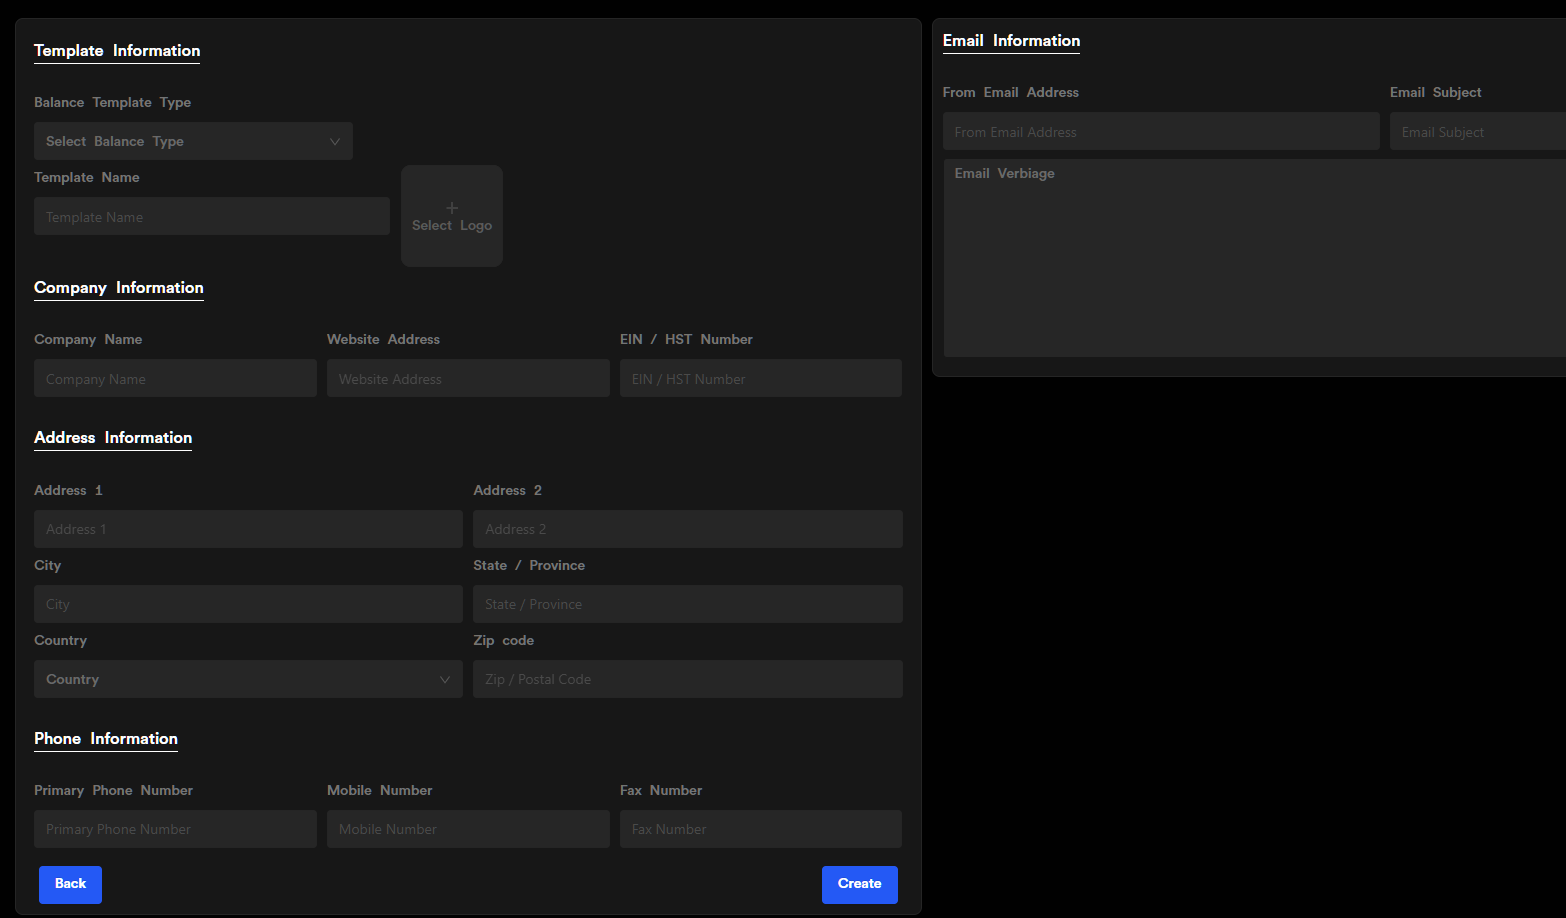
Create or Modify Invoice
Settings > Templates > Invoicing
To Create or Modify an Invoice
Click on Create
or
Select an existing Invoice Template and press on Modify
Provide a Template Name
Select a Logo for the Invoice Template
Provide Company Information:
Company Name
Website Address
EIN / HST Number
Provide Address Information:
Address 1
Address 2
City
State
Country
ZIP Code / Postal Code
Provide Phone Information:
Primary Phone Number
Mobile Number
Fax Number
Toggle Invoice Options
Show Destinations on Invoice
Show Rate on Invoice
Show Trunk Group Information
Provide Banking Information
Provide Email Information
The ‘From’ Email address: this will be the sender address used when distributing Rate Sheets
Email Subject: the subject for the emails distributed containing Rate Sheets
Email Verbiage: the email content

Delete an Invoice Template
Settings > Templates > Invoicing
In the list containing the Invoice Templates, click on the red Delete icon
In the pop-up window, press on Delete
Assign an Invoice Template in a Relationship
Settings > Templates > Invoicing
In the top bar menu, hover over Relationships and click on Relationships in the drop-down menu
In the Relationship Dashboard, click on a relationship and press on Modify
In the menu at the top right, navigate to Invoicing
Select the Invoice Template from the drop-down menu
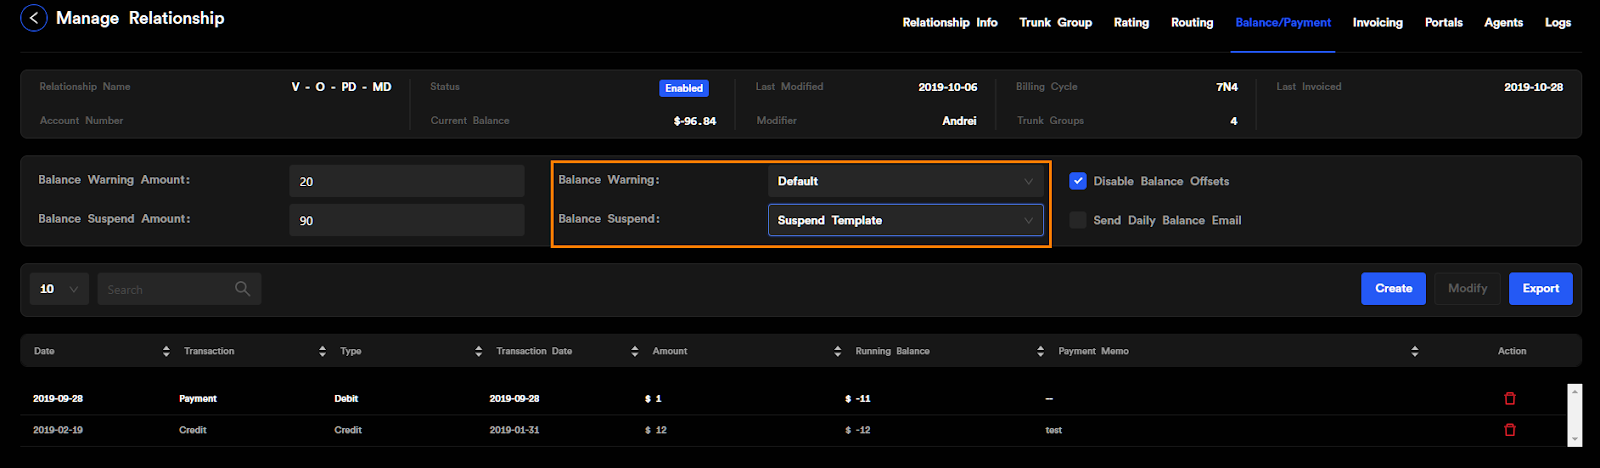
Balance/Payment Template
Set Balance/Payment Details
Settings > Templates > Balance/Payment
Balance Warning
Balance Suspend
Disable Balance Offsets
Send Daily Balance Email
Create or Modify Balance Template
Settings > Templates > Balance/Payment
To Create or Modify a Balance Template
Click on Create
or
Select an existing Invoice Template and press on Modify
Select the Balance Template Type
Balance Warning
or
Balance Suspend
Provide a Template Name
Select a Logo for the Balance Template
Provide Company Information:
Company Name
Website Address
EIN / HST Number
Provide Address Information:
Address 1
Address 2
City
State
Country
ZIP Code / Postal Code
Provide Phone Information:
Primary Phone Number
Mobile Number
Fax Number
Provide Email Information
The ‘From’ Email address: this will be the sender address used when distributing Rate Sheets
Email Subject: the subject for the emails distributed containing Rate Sheets
Email Verbiage: the email content
Delete a Balance Template
Settings > Templates > Balance/Payment
In the list containing the Invoice Templates, click on the red Delete icon
In the pop-up window, press on Delete

Portal Template
Settings > Templates > Portals
Toggle the following options:
Daily Performance Email
Display Rates
Re-enable on Payment
Apply PayPal Percentage and Fee
Allow Carrier To Change IPs
Display Accounting Information (allows the Portal user to access the Send Payments page)
Show Balance
Create or Modify a Portal template
Settings > Templates > Portals
To Create or Modify a Portal Template
Click on Create
or
Select an existing Invoice Template and press on Modify
Provide a Template Name
Select a Logo for the Invoice Template
Provide Company Information:
Company Name
Website Address
EIN / HST Number
Provide Address Information:
Address 1
Address 2
City
State
Country
ZIP Code / Postal Code
Provide Phone Information:
Primary Phone Number
Mobile Number
Fax Number
Provide Email Information
The ‘From’ Email address: this will be the sender address used when distributing Rate Sheets
Email Subject: the subject for the emails distributed containing Rate Sheets
Email Verbiage: the email content
Delete a Portal Template
Settings > Templates > Portals
In the list containing the Invoice Templates, click on the red Delete icon
In the pop-up window, press on Delete
Lists
Settings > Templates > Lists
Lists enable you to quickly apply processes to make routing decisions based on a list.
From the Lists dashboard, you can:
Create/Modify a list
View list contents
Delete a list

Create/Modify a List
Settings > Templates > Lists
Click on the Create/Modify button
Provide a name for the List
Select a List Type:
ANI
DNIS
IP
Prefix
Provide a description for the List
Select a date the List comes into effect
Press on the Create/Modify button

View List Contents
Settings > Templates > Lists > List Contents
In the List Contents window, you will be able to see and manage all the list entries:
Switch between List Contents and List Exports
Create a List Item
Export List Items
Upload List

Create List Item
Settings > Templates > Lists > List Contents
Provide a list value (ANI number, IP string)
(Optional) Provide the date the value will come into effect in the list
(Optional) Provide an expiration date for the value
Press Create
Export List Items
Settings > Templates > Lists > List Contents
Click on Export
Provide a name for the resulting .csv file
Click on Export

List Exports
Settings > Templates > Lists
In the List Exports tab, you can see all the previous Lists which have been exported and downloaded.
To download a list which has already been exported:
Press on the Download button at the right of the list item

Upload List Items
Settings > Templates > Lists > List Contents
Click on Upload
Press on Select File
Select your file through the navigator
Press on Upload
To create a .csv file with the correct format for uploading, you can Download a Sample for reference.

Delete a List item
Settings > Templates > Lists > List Contents
To the right of the list items, pres on the red Delete button
In the pop-up window, press Yes
Delete List
Settings > Templates > Lists
In the Lists Dashboard, click on the red icon at the right of the list items
In the pop-up window, press on Delete
Deck Group
Deck Groups allow you to define the rates used for each type of call based on geographical/geopolitical locations.
Deck Group Dashboard
Settings > Templates >Deck Groups
The Deck Group Dashboard enables you to see all the existing Deck Groups and manage them. In the Dashboard, you can:
Create/Modify Deck Group
Assign a Ratesheet
Upload a Ratesheet
Delete a Ratesheet

Create/Modify Deck Group
Settings > Templates > Deck Groups
In the Dashboard, click on Create/Modify
Provide a Name for the Deck Group
Select a Location for the Deck Group:
US & Canada
International
Select a Deck Type: US Jurisdictional, International, DID, Toll Free etc.
Provide a Description for Deck Group
Press on Create

Assign a Ratesheet
Settings > Templates > Deck Groups
In this window, you will be able to see all the currently assigned Ratesheets to this Deck Group
To assign:
From the drop-down menu, select the Ratesheet that you want to assign
Press on Assign
To unassign a Ratesheet, press on the red icon at the right of the list items.

Upload a Ratesheet
Settings > Templates > Deck Groups
At the right of the list items, click on the Upload button.
In the pop-up window, click on Select File
Select your file in the navigation window and press OK
Assign each header from the .csv file to the headers in the Ratedeck Mapping section
When finished, press Upload
 To correctly format a .csv template for upload, you can Download a Sample containing placeholder information to help you create adequate files.

Delete a Ratesheet
Settings > Templates > Deck Groups
In the Ratesheet Dashboard, click on the red icon at the right of the list items
In the pop-up window, press on Delete
Related Articles
302 Redirect Quick Start Guide
302 Redirect Quick Start Guide for STIR/SHAKEN Please read the following information: The general explanation, Peeredge implementation and routing logic information has been provided in the STIR/SHAKEN article. If you already have a 302 source that ...Trunk Group Registration - Softphone Setup Guides
Refer to the registration article for help with configuring a Trunk Group Registration prior to configuring your softphone client. Zoiper Zoiper is available for download at https://www.zoiper.com/en/voip-softphone/download/current This example guide ...Origination-Customer Relationship Configuration
A Relationship is a network configuration between your company and your customers or vendors. By creating a Relationship, you will set up the routing logic and rates that enable you to capitalize on the phone calls made on your network. An ...Quick Start Guide
Introduction What is Perimeter and what does it do? Perimeter/ECO enables carriers and enterprises to optimize global voice networks while leveraging machine learning technologies to automate the management and resiliency of global voice networks ...Origination NRC and MRC - Billing Profiles Guide
Origination NRC/MRC refers to the origination module for NRC (non-recurring charges) and MRCs (monthly recurring charges) that allows for charges to be configured for all assigned DIDs. The NRC/MRC configuration was designed in a manner to allow ...