Tools
This menu contains a set of tools which give you more control over Perimeter configurations, network usage and definitions.
Upload Status
Tools > Upload Status
The Upload Status page presents a summary of all the documents uploaded to Perimeter. This includes the Routeplan Filters, ANI Lists, DNIS Lists and Master Code Lists.
Name: the name of the uploaded file
Type: the function that the document is fulfilling
Status: Successful or Failed implementation status an uploaded file
Reason: error message if Failed
Export Date: the date of the file
Action Icon: download the uploaded file

Deck Generator
Ratedeck Generator History
Tools > Deck Generator
The Ratedeck Generator History dashboard allows you to:
Switch between Variable and Flat views
Assign a Ratedeck to a Trunk Group
Distribute the Ratedeck
Generate a Ratedeck
Create/Modify a Ratedeck
Export a list of Ratedecks
Delete a Ratedeck

The dashboard displays all the Created and Generated Ratedecks. You can view the following details about each Ratedeck:
Name: the name of the Ratedeck
Direction: Termination or Origination
Location: US & Canada or International
Category: Dialed, Toll-Free, Prefix Jurisdictional, DID
Modify Date: date which the ratedeck was last modified
Status:
Generate Required: the ratedeck is not ready and needs to be generated. You will need to use the Generate button located towards the top to create a ratedeck
Generated: the Ratedeck is ready to be used
Total Rates: the total number of rates generated in the ratedeck
Modifier: the user who last modified the Ratedeck
Action Icon: the red icon allows you to delete a Ratedeck
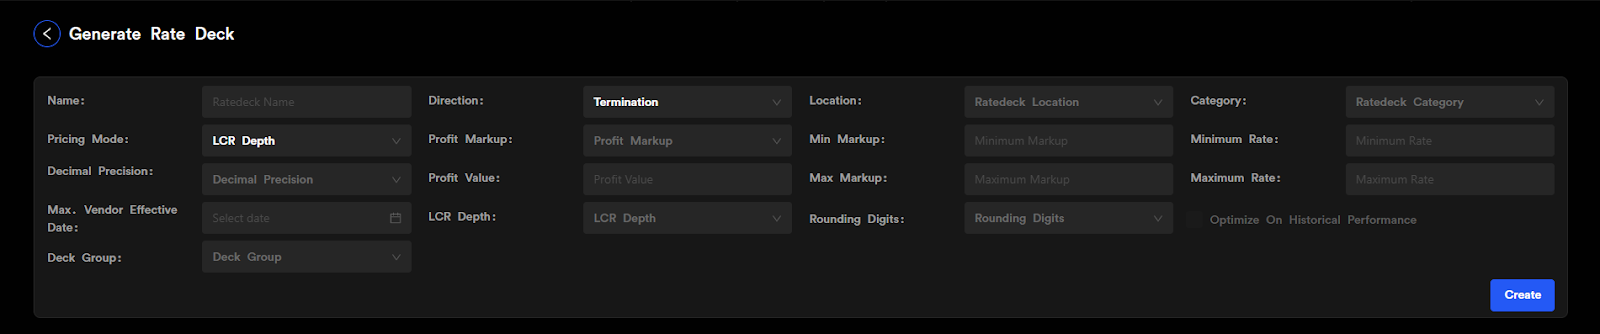
Create/Modify a Ratedeck
Tools > Ratedeck Generator > Create/Modify Ratedeck
To Create or Modify a Ratedeck, you will need to:
Click on Create/Modify
Provide a Name for the Ratedeck
Select the Direction:
Termination
Origination
Select the Location:
US & Canada
International (see 4b below if you choose this option)
Select the Category:
Prefix Jurisdiction (NPANXX)
LATA/OCN Jurisdictional
Peering
Local
Toll-Free
Select a Pricing Mode:
LCR Depth
Average
LCR Depth Average
Select the Profit Markup:
PPM
Percentage
Provide the Minimum Markup
Provide the Minimum Rate
Select the Decimal Precision
Provide the Profit Value
Provide the Maximum Markup
Provide the Maximum Rate (Note: if you sold a rate deck that has rates from .0001 through $1 or above, and you set the max rate at .0050: no calls will be able to use any rate above .0050)
Choose the Maximum Vendor Effective Date
Select the LCR Depth
Select the amount of Rounding Digits
Select a Deck Group

- Cost $0.00045
- Selling price = 40% higher than cost = $0.00045 x 1.4 = $0.00063
4a: US & Canada Settings
Tools > Ratedeck Generator > Create/Modify > US & Canada
Select the Indeterminate Rate:
Inter
Intra
Higer of Inter/Intra
Lower of Inter/Intra
Toggle Include 8YY pricing
Provide 8YY Price
Toggle Include Canada
Toggle Include USA
4b: International Settings
Tools > Ratedeck Generator > Create/Modify > International
Toggle “Create A-Z LCR”
Toggle “Create A-Z Fallback LCR”
Destinations - If “Creates A-Z LCR” is toggled OFF
Select the amount of destinations
Select the destination country from the drop-down menu
Select a destination from the drop-down menu
Click Add

International AZ Fallback - If “Create A-Z Fallback LCR” is toggled ON
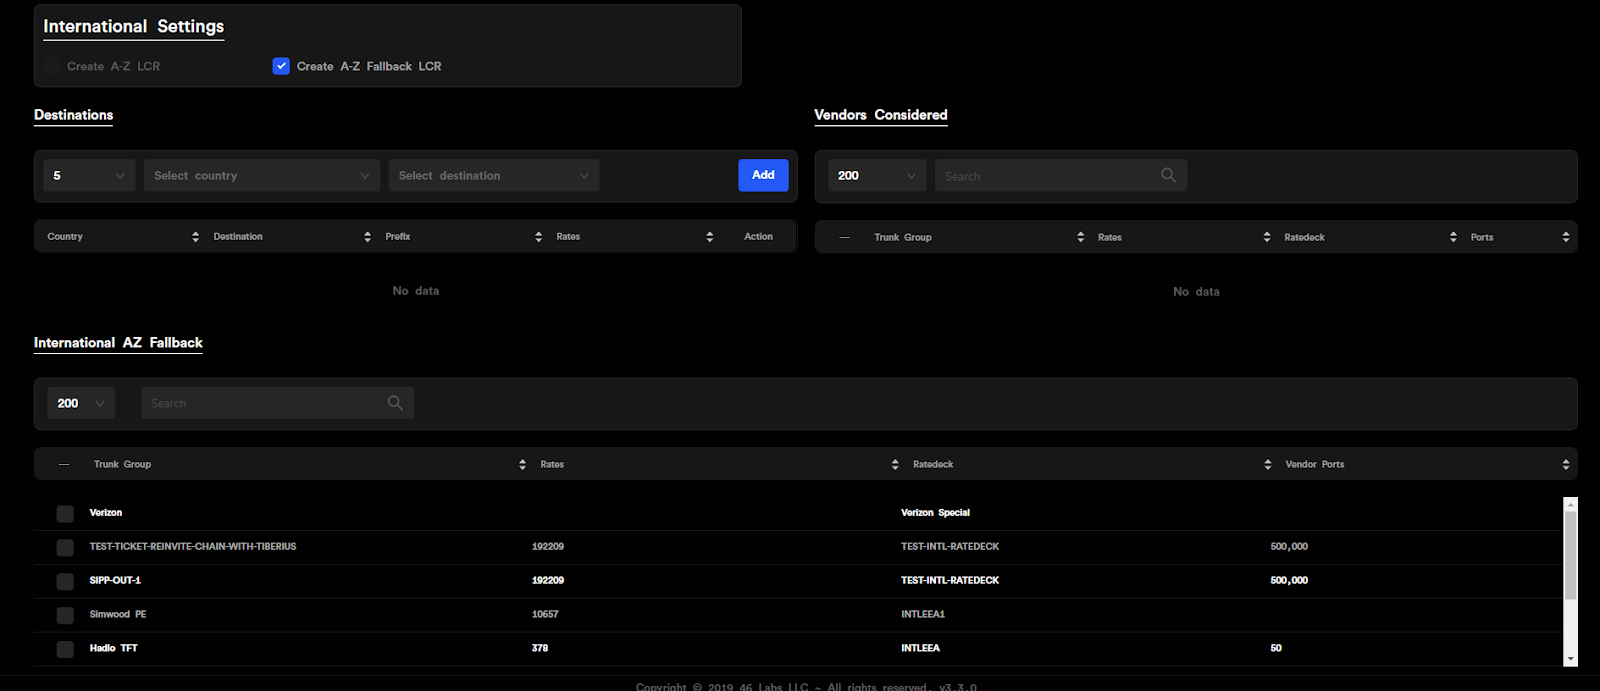
Vendors Considered
To add a vendor to the Consideration list, click on the checkbox to the left of the Vendor’s name to toggle on or off.
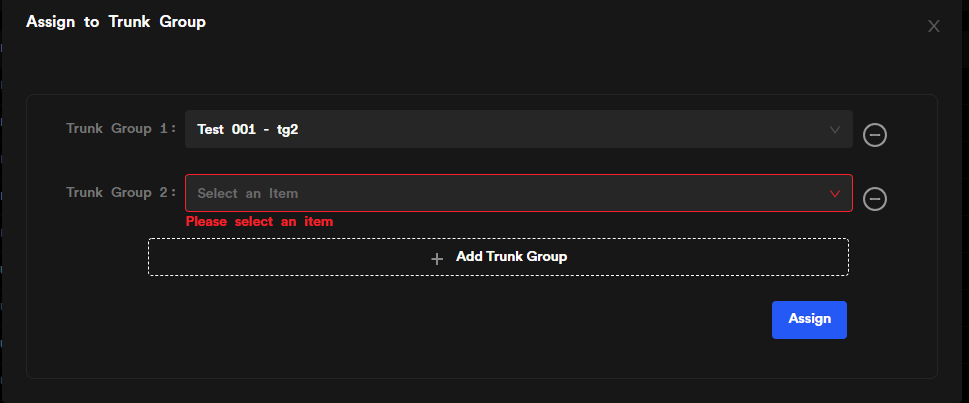
Assign to Trunk Group
Tools > Ratedeck Generator > Assign to Trunk Group
Select a Ratedeck with the Generated status
Click on Assign to Trunk Group
In the pop-up window, click on Add Trunk Group
Select a Trunk Group from the drop-down menu
Click Assign
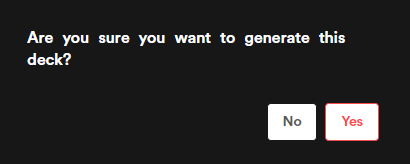
Generate
Tools > Ratedeck Generator > Generate
Click on a Ratedeck with the status: Generate Required
Click on Generate
In the pop-up window, press Yes
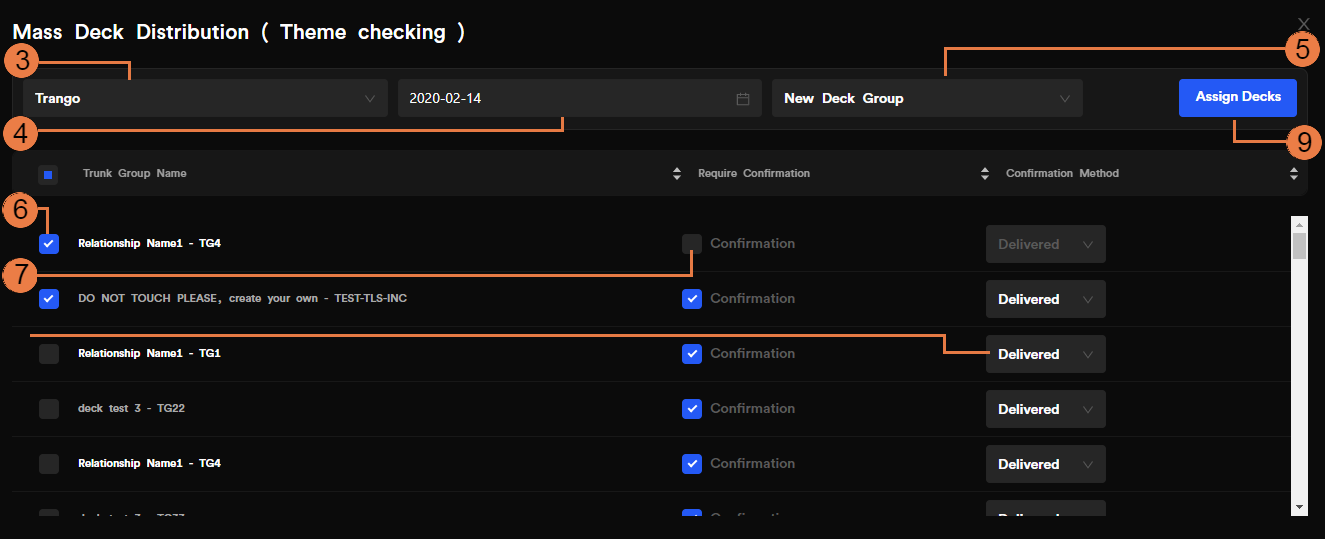
Distribute
Tools > Ratedeck Generator > Distribute
Click on a Ratedeck with the status: Generated
Click on Distribute
In the pop up window, select the Template
Select a date for the distribution using the calendar tool
Select the Deck Group
Still within in the pop-up window in the Trunk Group List, toggle the checkbox to the left of the Trunk Group Name
Toggle whether you require a Confirmation
Select the Confirmation Method
Click on Assign Decks in the top right of the pop-up window
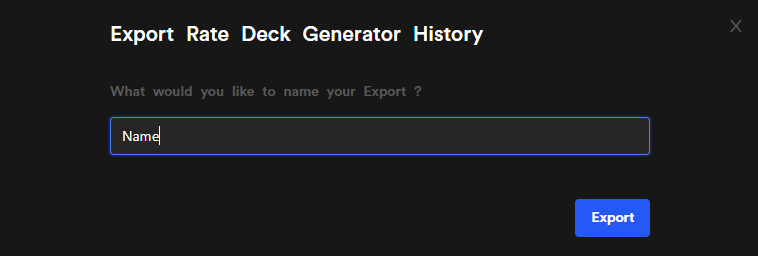
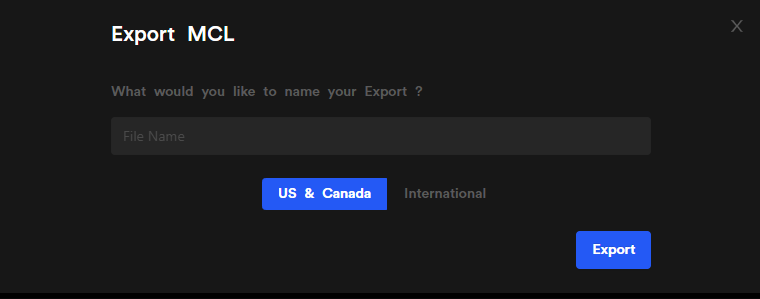
Export
Tools > Ratedeck Generator > Export
Click on a Ratedeck with the status: Generated
Click on Export
Provide a name for the resulting .csv file
In the pop-up window, click on Export
A file download will begin shortly
Ratedeck Generator LCR Tab
Tools > Deck Generator > LCR
The LCR tool allows you to create the LCR Ratedeck based on your Master Code List or based on the rates sold to a customer.

Click on Create
Select LCR Type:
Create by MCL: bases the LCR Ratedeck output on the MCL codes. Next you can select the Nth depth, which will give you an excel sheet with your MCL codes and the Nth rate from your vendors.
Create by deck: bases the LCR output on a customer rate deck you select. Next you can select the Nth depth, which will give you an excel sheet with your customer codes and the Nth rate from your vendors.
Select LCR Depth
Select Country
Select Rate Type:
EEA
International
Click on Create

Master Code List
Tools > Master Code List
The Master Code List (MCL) is a list with definitions for routing international calls. These need to be set up correctly for your calls to be routed as intended. A misconfigured Master Code List would cause major issues for international calls. Peeredge automatically detects new vendor codes when importing international vendor decks and adds them to the MCL. The newly added codes (Destination Name and Destination codes) can be seen on the MCL page under the “Appended MCL Codes” tab.
From the Master Code List Dashboard, you can:
Create/Modify a MCL Template
Create a single Country entry
Upload a .csv File containing a Country List
Export the existing MCL

Create / Modify a MCL Template
Tools > Master Code List > Create/Modify
Click on Create/Modify
Provide a name for the MCL Template
Select a list to copy from
Click on Create/Save Changes

Countries
Tools > Master Code List > MCL Template > Countries
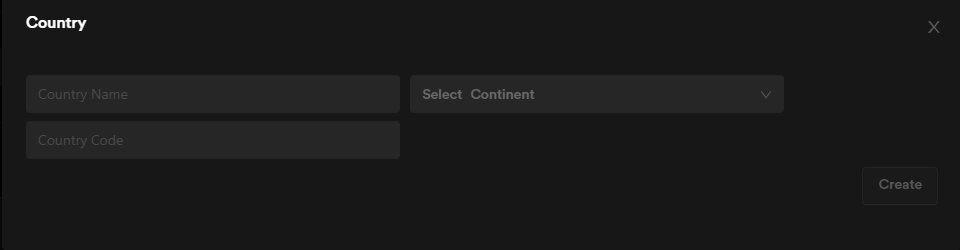
Create Country
Tools > Master Code List > MCL Template > Countries > Create
Click on Create Country
Provide the Country Name
Select the continent from the drop-down menu
Provide the Country Code
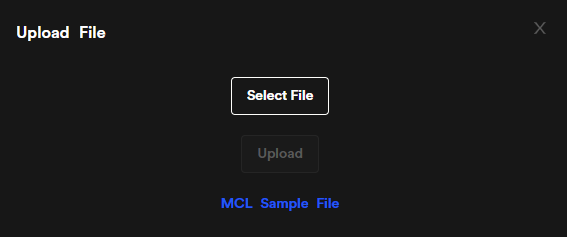
Upload File
Tools > Master Code List > MCL Template > Countries > Upload File
Click on Upload File
Click on Select File and select your file through the explorer window
Click on Upload
Export
Tools > Master Code List > MCL Template > Countries > Export
Click on Export
Provide a name for the resulting .csv file
Select between US & Canada and International
Click on Export
A file download will begin shortly
 \
\
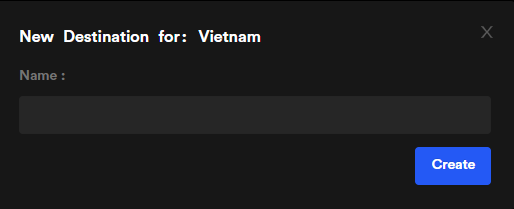
Destinations
-
Click on Create
-
Provide a name for the Destination
-
Click on Create
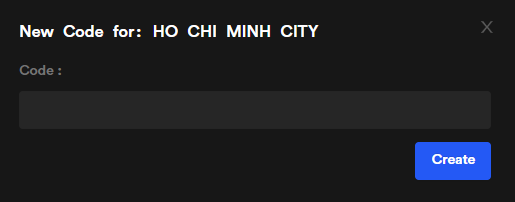
Codes
Click on Create
Provide the Code
Click on Create
Pending Decks
Tools > Pending Decks
When distributing Ratedecks through the Deck Generator tool, you will see any outstanding distributions on page.
You can use the drop-down menu located at the top right of the page to select between Pending and Assigned decks.
From the Pending Decks page, you have the following fields available:
Deck Name
Trunk Group
Effective Date: you can edit the Effective Date by clicking on it
Status: Confirmed or Not Confirmed
Method: Delivered or Not Delivered
Resend Deck Notification: click the icon to resend a notification to the rate contact
Manual Confirmation: click to manually confirm
Delete a Pending Deck

From the Assigned Decks page, you have the following fields available:
Deck Name
Trunk Group
Effective Date: you can edit the Effective Date by clicking on it
Status: Confirmed or Not Confirmed
Method: Delivered or Not Delivered
Resend Deck Notification: click the icon to resend a notification to the rate contact
Delete a Pending Deck

Platform Status
Tools > Platform Status
The Platform Status Report shows your network components alongside their current status and uptime.
Components: Data Centre, Load Balancer, Media Switch, Traffic Manager, Portal Server, Warehouse Server
Status: OK or failed
Uptime: how long the component has been continuously active

Live Calls
Tools > Live Calls
The Live Calls report enables you to see the currently connected calls on your network.
You can filter the list of current calls using the following filters:
Incoming Trunk Group: select the trunk group from the drop-down menu
Outgoing Trunk Group: select the trunk group from the drop-down menu
Limit: the number of live calls to be displayed
Click on Refresh to update the list in case calls ended and others have started
Click Kill Calls to terminate all selected calls
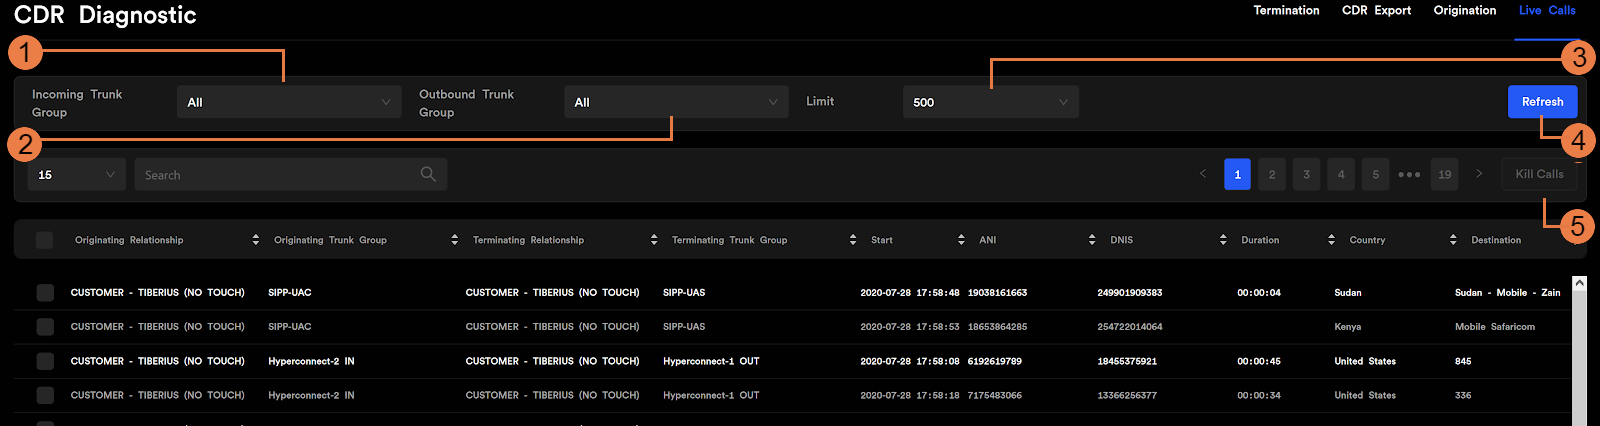
Originating Relationship: the originating relationship the call is routed from
Originating Trunk Group: the originating trunk the call is routed from
Terminating Relationship: the terminating relationship the call is routed from
Terminating Trunk Group: the terminating trunk the call is routed from
Start: start time of the call
ANI: Automatic Number Identification
DNIS: Dialed Number Identification Service
Duration: how long the call lasted
Country
Destination
Live Trace
Tools > Live Trace
The live trace runs on the load balancer (LB) and streams any and all data for 120 seconds to the UI. Users can catch all SIP packets matching the criteria specified in the filter.
Fields
You can control Live Tracing with the following:
Location
Filter: the filter is matched as a string so anything typed in this field will be matched on a case sensitive basis. Please do not use generic keywords for searching or it may cause your browser to hang as it will match and stream all data back to you.
Start/Stop Trace
Clear
Export

Call Recording
Tools > Call Recording


Click on the blue Create button on the under CALEA Target on the Call Recording page
Add the Target ANI or DNIS: the phone number you want to capture the recording for
Add the Start Date and optionally the End Date to set the time frame to capture recordings
Add a Case ID to identify/tag the CALEA Target (Call Recording entry)
Click on Create

Email History
Tools > Email History
On this page you can view all the email communications that have been sent out from Perimeter.
Invoice
Balance
Trunk Groups
Rate Sheet
Agent
User
Portal

For each email, you will see the following details:
From Email
To Email
Email Subject
Date Sent
Status: Opened, Failed or Delivered
Action: View History

General Logs
Tools > General Logs
This page allows you to view a list of all the actions that have taken place in Perimeter.
The dashboard allows you to:
Generate logs for a type of activity
Search for an entry by name
Apply a time filter
Reset search/filter
Export the list of logs
You can view the following information:
Type
Title
Action
Modifier
Section
Created At
Comment

Related Articles
Latest Push List for PE/ECO
August 2022 Push List: DNC List: The National Do Not Call Registry is a list of phone numbers from consumers who have indicated their preference to limit the telemarketing calls they receive. The DNC list will be loaded into a 46 Labs managed ...MCL
The MCL (Master Code List) refers to the list of international dialing codes.302 Redirect Quick Start Guide
302 Redirect Quick Start Guide for STIR/SHAKEN Please read the following information: The general explanation, Peeredge implementation and routing logic information has been provided in the STIR/SHAKEN article. If you already have a 302 source that ...Origination-Customer Relationship Configuration
A Relationship is a network configuration between your company and your customers or vendors. By creating a Relationship, you will set up the routing logic and rates that enable you to capitalize on the phone calls made on your network. An ...DNC (Do Not Call Registry) Integration
The National Do Not Call Registry is a list of phone numbers from consumers who have indicated their preference to limit the telemarketing calls they receive. The DNC list will be loaded into a 46 Labs managed database and will be updated bi-weekly ...